Herkese merhabalar bu yazımda sizlere React içerisinde bulunan bir state yönetim aracı olan Context Api hakkında bilgiler veriyor olacağım. Context Api’ye geçmeden önce state , props ve state yönetim araçları hakkında küçük bilgiler vermek istiyorum.
State Nedir?
Bir component’in durumunu belirten, niteleyen ve manipüle edilebilen verilere state diyoruz. Örnek bir state oluşturalım.
Function Componentlerde State Oluşturma
Function componentlerde state oluşturmak için genel anlamda React içerisinde bulunan useState Hook u kullanılarak oluşturulmaktadır.
import React, { useState } from 'react';

function Example() {
  // Declare a new state variable, which we'll call "count"
  const [count, setCount] = useState(0);

  return (
    <div>
      <p>You clicked {count} times</p>
      <button onClick={() => setCount(count + 1)}>
        Click me
      </button>
    </div>
  );
}
Class Componentlerde State Oluşturma
Birde class yapısı ile bir state nasıl oluşturulur ona bakalım.
class Example extends React.Component {
  constructor(props) {
    super(props);
    this.state = {
      count: 0
    };
  }

  render() {
    return (
      <div>
        <p>You clicked {this.state.count} times</p>
        <button onClick={() => this.setState({ count: this.state.count + 1 })}>
          Click me
        </button>
      </div>
    );
  }
}
Yukarıda state nedir , function ve class componentlerde nasıl kullanılır öğrenmiş olduk. Şimdi ise props nedir ona bakalım.
Props Nedir?
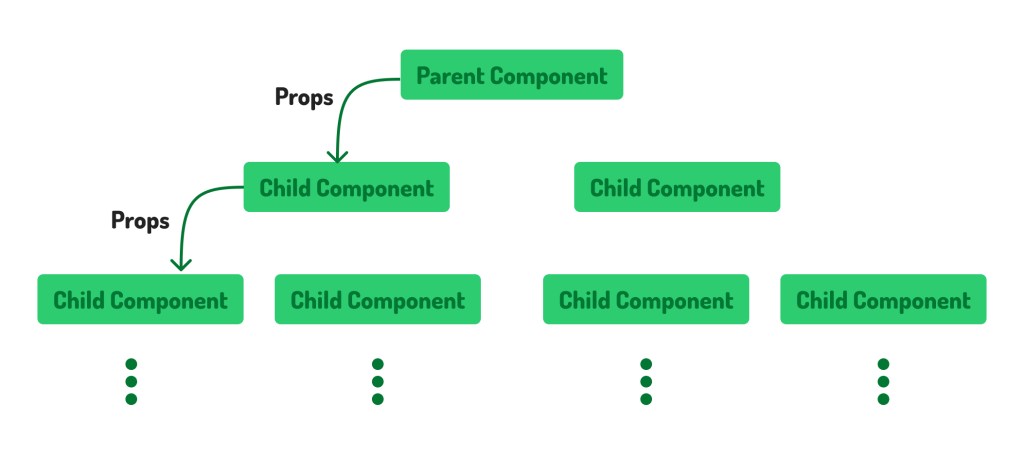
Parent component de oluşturulan bir bir state in child component ‘ine aktarabilme yöntemidir. Bu aktarılma aşamasına da Prop Drilling denir. Basit bir props örneği ile props kullamına bakalım.
function Welcome(props) {
  return <h1>Hello, {props.name}</h1>;
}

function App() {
  return (
    <div>
      <Welcome name="Sara" />
      <Welcome name="Cahal" />
      <Welcome name="Edite" />
    </div>
  );
}
Welcome bizim child componentimizdir. App içerisine welcome child componentini eklediğimizde name attribute’i ile bir props oluşturmuş olmaktayız. Sayede child componente props yardımı ile bir veri gönderebilmiş olduk. Evet, props nedir onuda öğrenmiş olduk. Şimdi ise çok kullanılan state yönetim araçlarına göz atalım.
Çok kullanılan State Yönetim Araçları
- Context Api (Küçük projeler için ideal olan bir state yönetim aracıdır.)
- Redux(Redux Toolkit) (Büyük projelerde çok kullanılan bir state yönetim aracıdır.)
- Recoil
- Jotai
- Rematch
- Zustand
- Hookstate
Evet , Yukarıda state , props ve bazı çok kullanılan bazı state yönetim araçlarını öğrenmiş olduk. Şimdi ise ana konumuz olan context api state yönetim aracına bakalım.
Context Api Nedir?
İlk react projesi oluşturduğumuzda statelerimizi props un yardımı ile bir alt component e taşıyabiliyorduk. Ama proje büyüdüğünde veya iç içe 10-20 component olduğunda işlerimiz baya zorlaşıyordu. Bir süre sonra state yönetimi yapamaz duruma geliyorduk. Burada ise yardımımıza state yönetim araçlarından biri olan context api devreye girmekte. Context Api oluşturmuş olduğumuz stateleri yönetmemiz konusunda yardımcı olmaktadır. Ama bunu nasıl yapar?
Context Api oluşturulan componentleri bir kapsayıcı provider içerisine alır. Bu sayede perant component de oluşturulan bir state bir alt component e propslar ile aktarılmadan en alt component e aktarılabilir.
Context api olmadan statetimizi alt component e aşağıdaki kodlamada olduğu gibi aktarmamız gerekiyordu.
import React, { useState } from "react";
import "./App.css";

const App = () => {
	const [title, setTitle] = useState("Hello World");
	return <HeaderContainer title={title} />;
};

const HeaderContainer = (props) => {
	const { title } = props;
	return (
		<HeaderBackground>
			<HeaderTitle title={title} />
		</HeaderBackground>
	);
};

const HeaderBackground = (props) => {
	return <div className="header-image">{props.children}</div>;
};

const HeaderTitle = (props) => {
	const { title } = props;
	return <p>{title}</p>;
};

export default App;
Şimdi ise adım adım bu yapıyı context api ile hazırlayalım.
1-) Projenin src dosyası içeisinde bir context.jsx adında bir dosya oluşturalım. Aşağıdaki kodları bu dosyanın içerisine ekleyelim. Ardından contenxt yapısını kullanacağımız her component içerisinde bu dosyayı import ediyor olacağız.
import { createContext, useContext } from "react";

const context = createContext();

export { context, useContext };
2-) Şimdi yukarıdaki props lar ile yapılan state yönetimini düzenleyelim ve state yönetimini context api ile yapalım.
import React, { useState } from "react";
import "./App.css";
import { MainContext, useContext } from "./context/context";

const App = () => {
	const [title, setTitle] = useState("Hello World");
	return (
		<MainContext.Provider value={{ title, setTitle }}>
			<HeaderContainer />
		</MainContext.Provider>
	);
};

const HeaderContainer = () => {
	return (
		<HeaderBackground>
			<HeaderTitle />
		</HeaderBackground>
	);
};

const HeaderBackground = (props) => {
	return <div className="header-image">{props.children}</div>;
};

const HeaderTitle = () => {
	const { title } = useContext(MainContext);
	return <p>{title}</p>;
};

export default App;
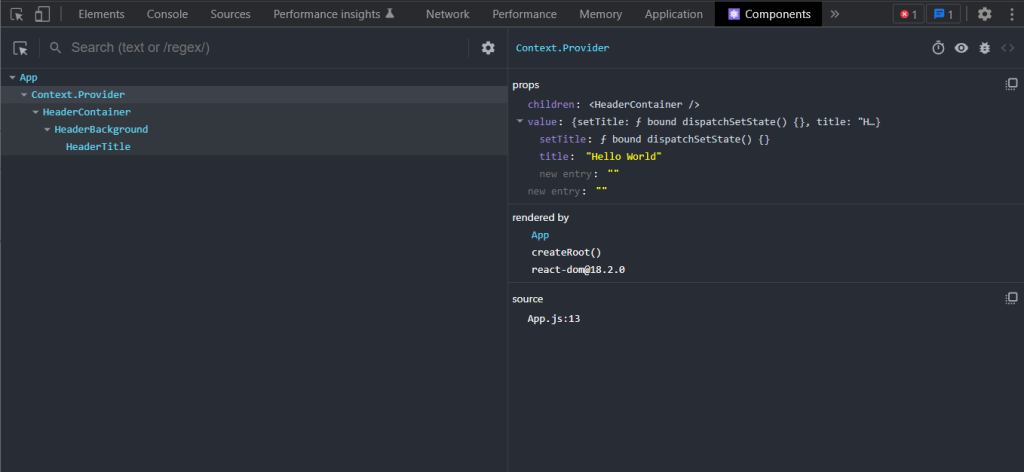
Evet, Context api kullanarak App componentinden HeaderTitle componentine title statetimizi aktarmış oldum. Kodlama iç içe bir props yapısı olmayınca kodlarımız daha okunur oldu ve işimizde kolaylaşmış oldu. App içerisinde MainContext.Provider ile kullanılan value değerinde biraz daha düzenleme yapabiliriz. Değerleri bir StateValue değerinde tutabilir. O değeri value değerine aktarabiliriz. Bu şekilde yapılan kodlamanın daha temiz olacağını düşünüyorum. 😊
const App = () => {
	const [title, setTitle] = useState("Hello World");

	const StateValue = {
		title,
		setTitle,
	};
	return (
		<MainContext.Provider value={StateValue}>
			<HeaderContainer />
		</MainContext.Provider>
	);
};
Bu yazımda sizlere state , props ve bir state yönetim aracı olan Context Api ile ilgili bilgiler vermiş oldum. Bir sonraki blog yazımda görüşmek üzere. Kendinize iyi bakın. 😁